3D Design: Personalize a Gimbal
Personalizing an existing model is a great introduction to 3D design. It gives budding designers an opportunity to explore a well-designed working model. Teachers and workshop presenters are often under time constraints when exploring design tools. By carefully selecting a small model that prints well on the available 3D printer, there is a high likelihood of creating a successful design.
A great model for personalization is Parametric Gimbal, prints already assembled by Bluebie, http://www.thingiverse.com/thing:100362. This is an example of a print-in-place design that uses careful placement of captive parts to create a spinning model that require no assembly. The gimbal is fun to play with and by personalizing it, beginning designers will be able to discover how the model works.
The instructions for personalizing the gimbal model will use Tinkercad.com. Tinkercad is a free 3D design tool that is easy to use and has plenty of features. The site has references to the old subscription model but has moved to completely free.
Personalize a Gimbal
-Create a New Design in Tinkercad
-Drag a ruler onto the workplane and set the Snap Grid to 0.1

-Click Import –> URL
-Paste http://www.thingiverse.com/download:237283 into the box and click Import

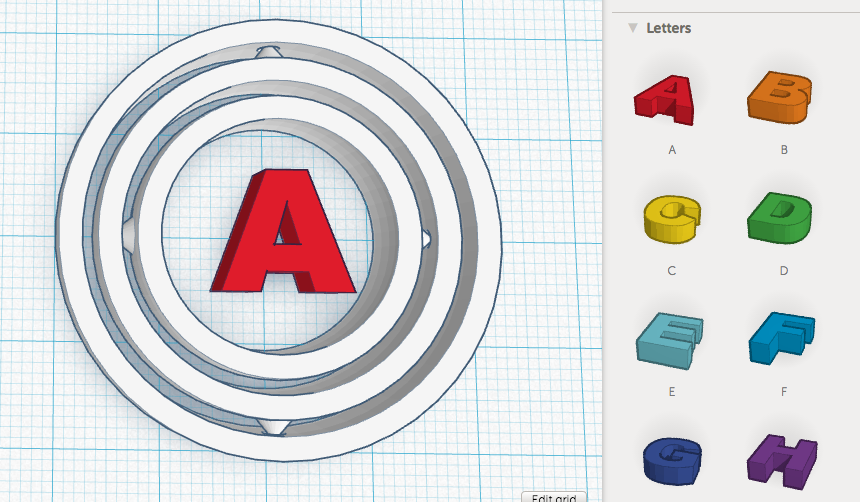
-Drag over a letter, number or shape from the left hand side menu and move to the center of the gimbal.
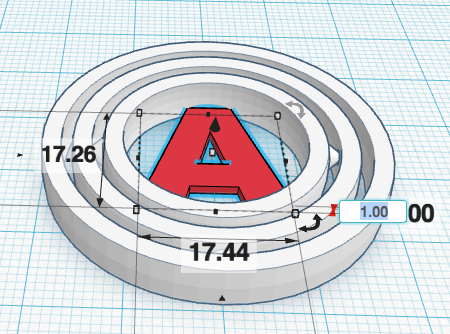
-Resize and move the new object so that the corners touch the inner ring of the gimbal. Use the arrow keys to precisely move the object. Be careful that the object is touching the inner ring but does not go past the outer edge of the small ring.

-Click on the center object and then click on the number showing the height and change it to 1.
-Select both the gimbal and the center object then click group to create a single model.
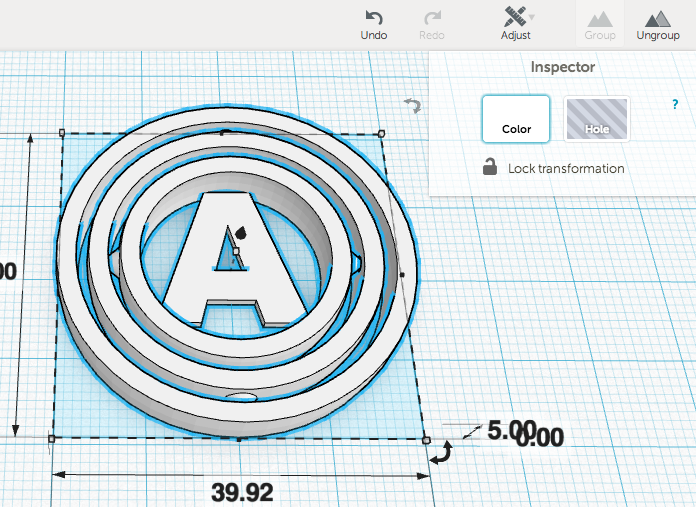
-Click Design –> Download for 3D Printing . Choose the STL File.
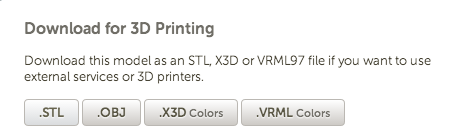
-Use the downloaded STL file to 3D print your new personalized gimbal.
You can also import SVG (vector graphics) files to personalize your design. A Google image search for Adafruit SVG gives http://www.adafruit.com/pt/adafruit.svg as the first image.
-Click Import –> URL and paste http://www.adafruit.com/pt/adafruit.svg into the box then click import.
-Follow the instructions above to finish personalizing your model.

The Adafruit Gimbal is available on Thingiverse at http://www.thingiverse.com/thing:322825
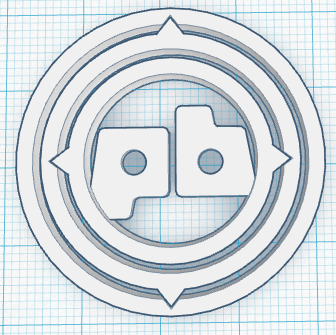
You can also import STL files to personalize your design. Try http://www.thingiverse.com/download:4252 for the Hack a Day logo or go to http://printrbot.com/2013/07/04/printrbot-logo-files/ and download the Printrbot logo STL.
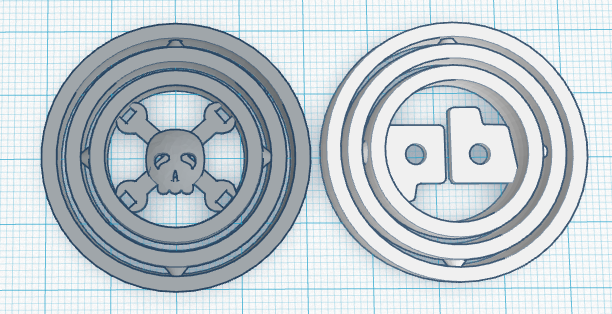
The Hackaday Gimbal is available on Thingiverse at http://www.thingiverse.com/thing:322829.
The Printrbot Gimbal is available on Thingiverse at http://www.thingiverse.com/thing:317778
-To see how the gimbal works pull a box over from the left and change it to a hole.
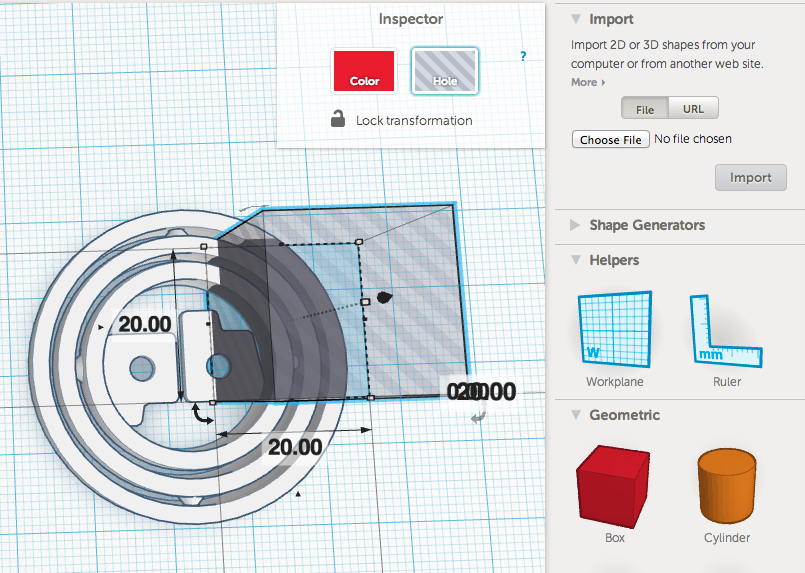
-Resize and move the Box shaped hole so it covers the gimbal then raise the box 2.5 mm above the surface.
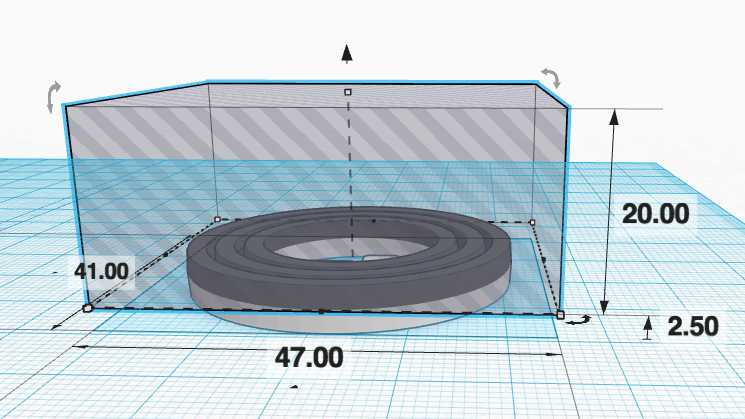
-Select the gimbal and the hole and click Group for a horizontal cross-section view of the gimbal interior.
-Note how small cones on the inner ring fit into dimples in the next ring. The parts don’t touch. When printed the inner ring will be trapped but still able to spin freely.
Now the 3D Designer can add this feature into future designs.
Pingback: Community Corner: This Week in Adafruit’s Community: May 9, 2014 « adafruit industries blog
Pingback: Print In Place MOM Gimbal Design by DesignMakeTeach #MothersDay « adafruit industries blog
Pingback: Top 5 3D Printable New Year’s Eve Gizmos, Gadgets & Accessories - 3DPrint.com
Pingback: Featured on Thingiverse: A Look at the Stats | Design Make Teach
Pingback: 2016 New Years Designs | Design Make Teach
Pingback: 3D Model: 2017 Gimbal | Design Make Teach
Pingback: 3D Model: 2017 Mini Gimbal Set | Design Make Teach
Pingback: 3D Model: LOVE Gimbal | Design Make Teach
Pingback: Mom Gimbal | Design Make Teach