Printrbot Metal Plus Unboxing
I unboxed my personal Printrbot Metal Plus with heated bed this weekend and have been sharing photos and initial impressions on Instagram. This is a recap for the purpose of easy reference on the blog.
Warning: This is not a review or recommendation of this printer. I purchased the Printrbot Metal Plus based on my own needs and budget. I did not follow any specific testing protocol or manufacturer’s protocol. Make magazine is a great place to check for 3D printer reviews. I used a coupon code from Brook Drumm, owner of Printrbot, as well as store credit for converting the Printrbot .dxf files on Youmagine to .svg for use in Inkscape.
Background: I purchased a personal Printbot LC v2 in March 2013. At the time, there was an educator’s discount making it a shipping 3D printer that I could afford. The LC v2 was a laser cut kit with a slightly smaller than 6″x6″x6″ build volume. Since then I have been involved in a summer STEM camp and a grant that gave me responsibility for a small fleet of laser cut Printbots. I gave numerous demos and put thousands of hours of print time in. Last year, through consulting on the start of the Printrbot Learn blog I was given a Printrbot Metal Simple (6″x6″x6″) and also manage one for STEM camp. The change from the laser cut kits to all metal printer with a z-probe was incredible. The quality and reliability compared to the earlier models are incredible. Since then, I almost exclusively use the Printbot Metal Simple. Recently, I have had a lot of projects and demands for 3D printing both personal and at work.
Purchasing: I need a reliable 3D printer with a large build size and the ability to print in exotic materials. I considered the Ultimaker 2, Type A Series 1 and Lulzbot Taz 5. (I also have access to a Makerbot 5th generation printer.) I would love to be able to try all of those printers. (Feel free to contact me about sending a demo unit.) Ultimately, I went with the printer that I could afford. Hopefully the quality is even higher than the Metal Simple and that new upgrades are in the works.
Shipping: From initial order on website to shipping took 1 week. Shipping from California via UPS took 1 week. Ordered 3/6 arrived at my door 3/20. The box looked a little rough when it arrived. Yes, there was a Fragile sticker on it. No, the shipping guys do not pay attention to stickers, they have a lot of boxes to move. 39 lbs.

Inside the big box is a smaller box suspended by foam corner braces. The interior box was dented slightly too.


Contents: Opened the interior box for my first glimpse of the printer. It was upside down. The box doesn’t have any indication if there is a preferred method of opening. I just inverted the box on the table and pulled it straight off. Insert says to visit the website. I made sure to read everything about the hardware setup. Mainly cutting the zip tie on the extruder and then trying to figure out if anything was missing. My heated bed model does NOT have a y-adapter for power. Contains: Printer, power supply, micro-USB cable, wrenches & spacer for z-height adjustment, small amount of filament. Beefy PC power supply w/ custom metal case and integrated spool holder is big part of the heated bed upgrade. I almost bought this separate as I didn’t realize it came with this model.


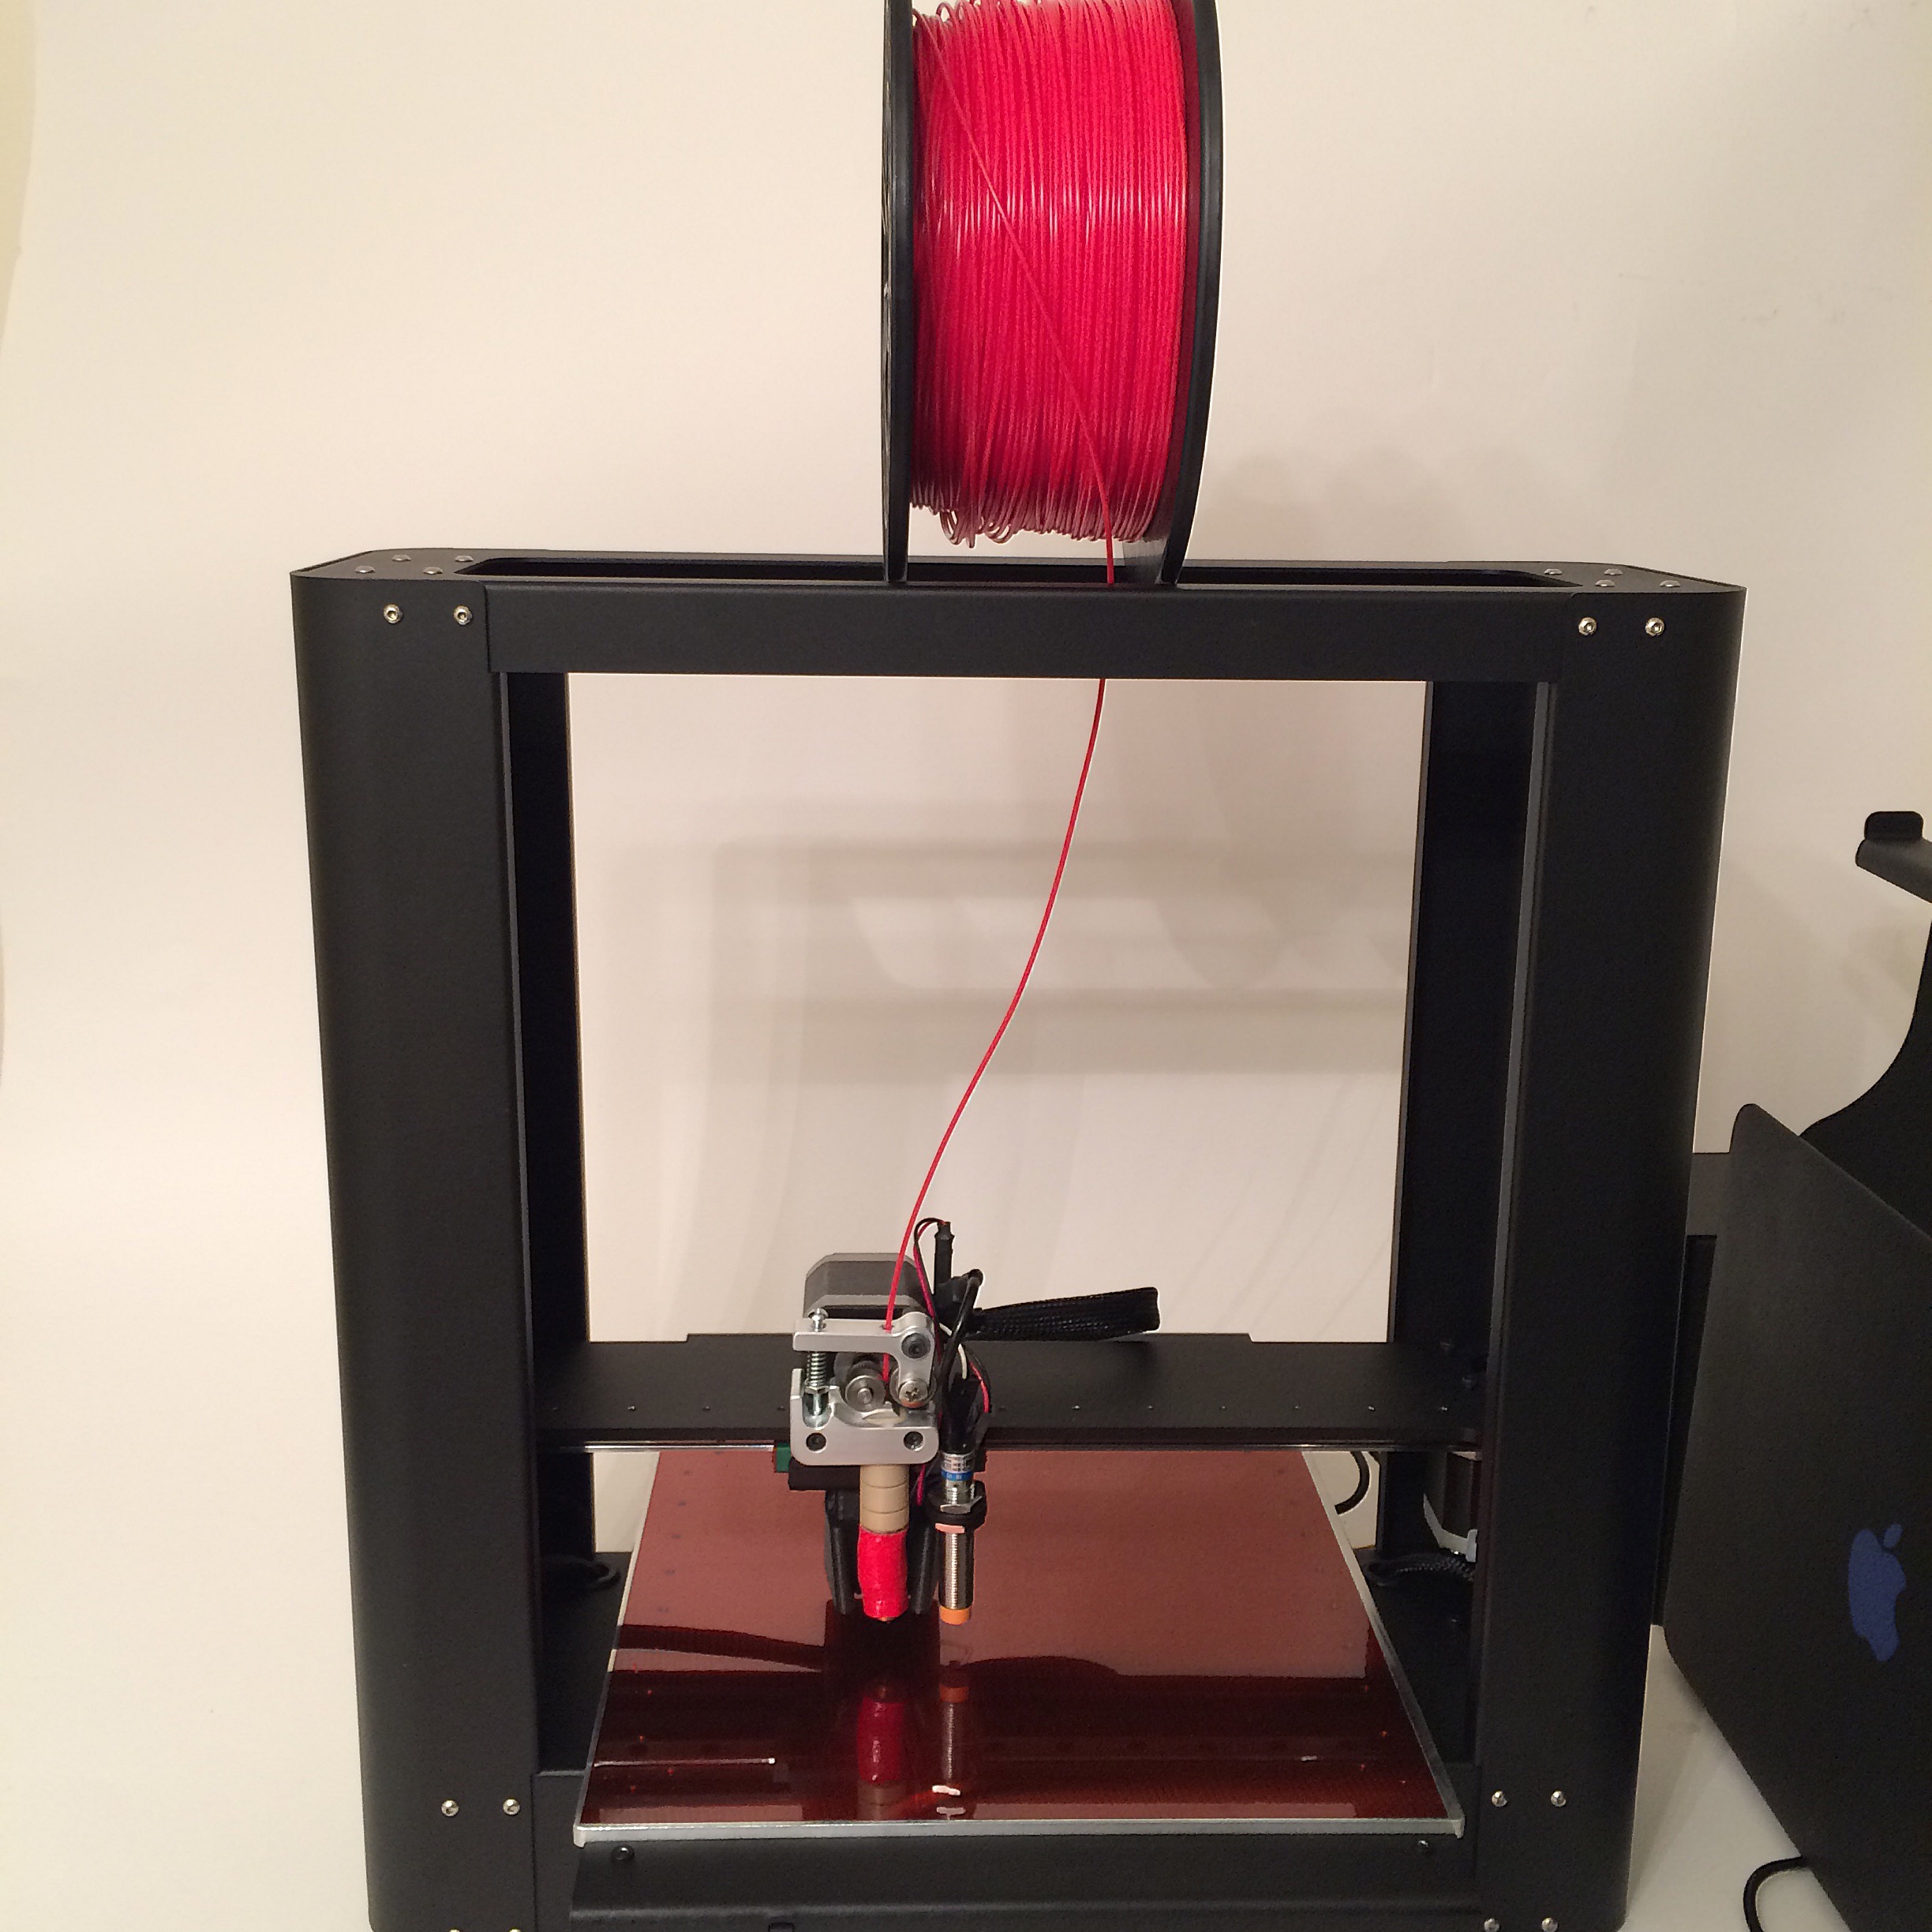
Setup: Plug in the power and plug in the USB cable. Beautiful. I like the black metal more than the laser cut kits. Moved the bed back and forth to determine space needed. Roughly 17″ by 26″ of clear table space for the printer in operation. This will be my beefy stay-at-home production printer.

Calibration: Brought extruder up to temp and loaded new filament. A little bit of neon green fin extruder from the factory test. Ran an existing model to start the process of leveling the z-probe. The printer leaves the factory with the extruder set a little high in respect to the z-probe activation height in case something settles in shipping. Driving the extruder into the metal print bed with no springs on the bed and a fully constrained z-axis would be very bad for the the bed surface and the print nozzle.

Setting the correct z-layer height is a slow and careful process. Also has been a long time since using a heated bed with Kapton for PLA. Around 7 adjustments before getting a solid stick.

Concerned about the rubbing sound when resting the spool above the printer. Seems like a lot of friction. Not sure if I should have spool on top or use the spool holder on power supply. Have seen photos of both methods online.
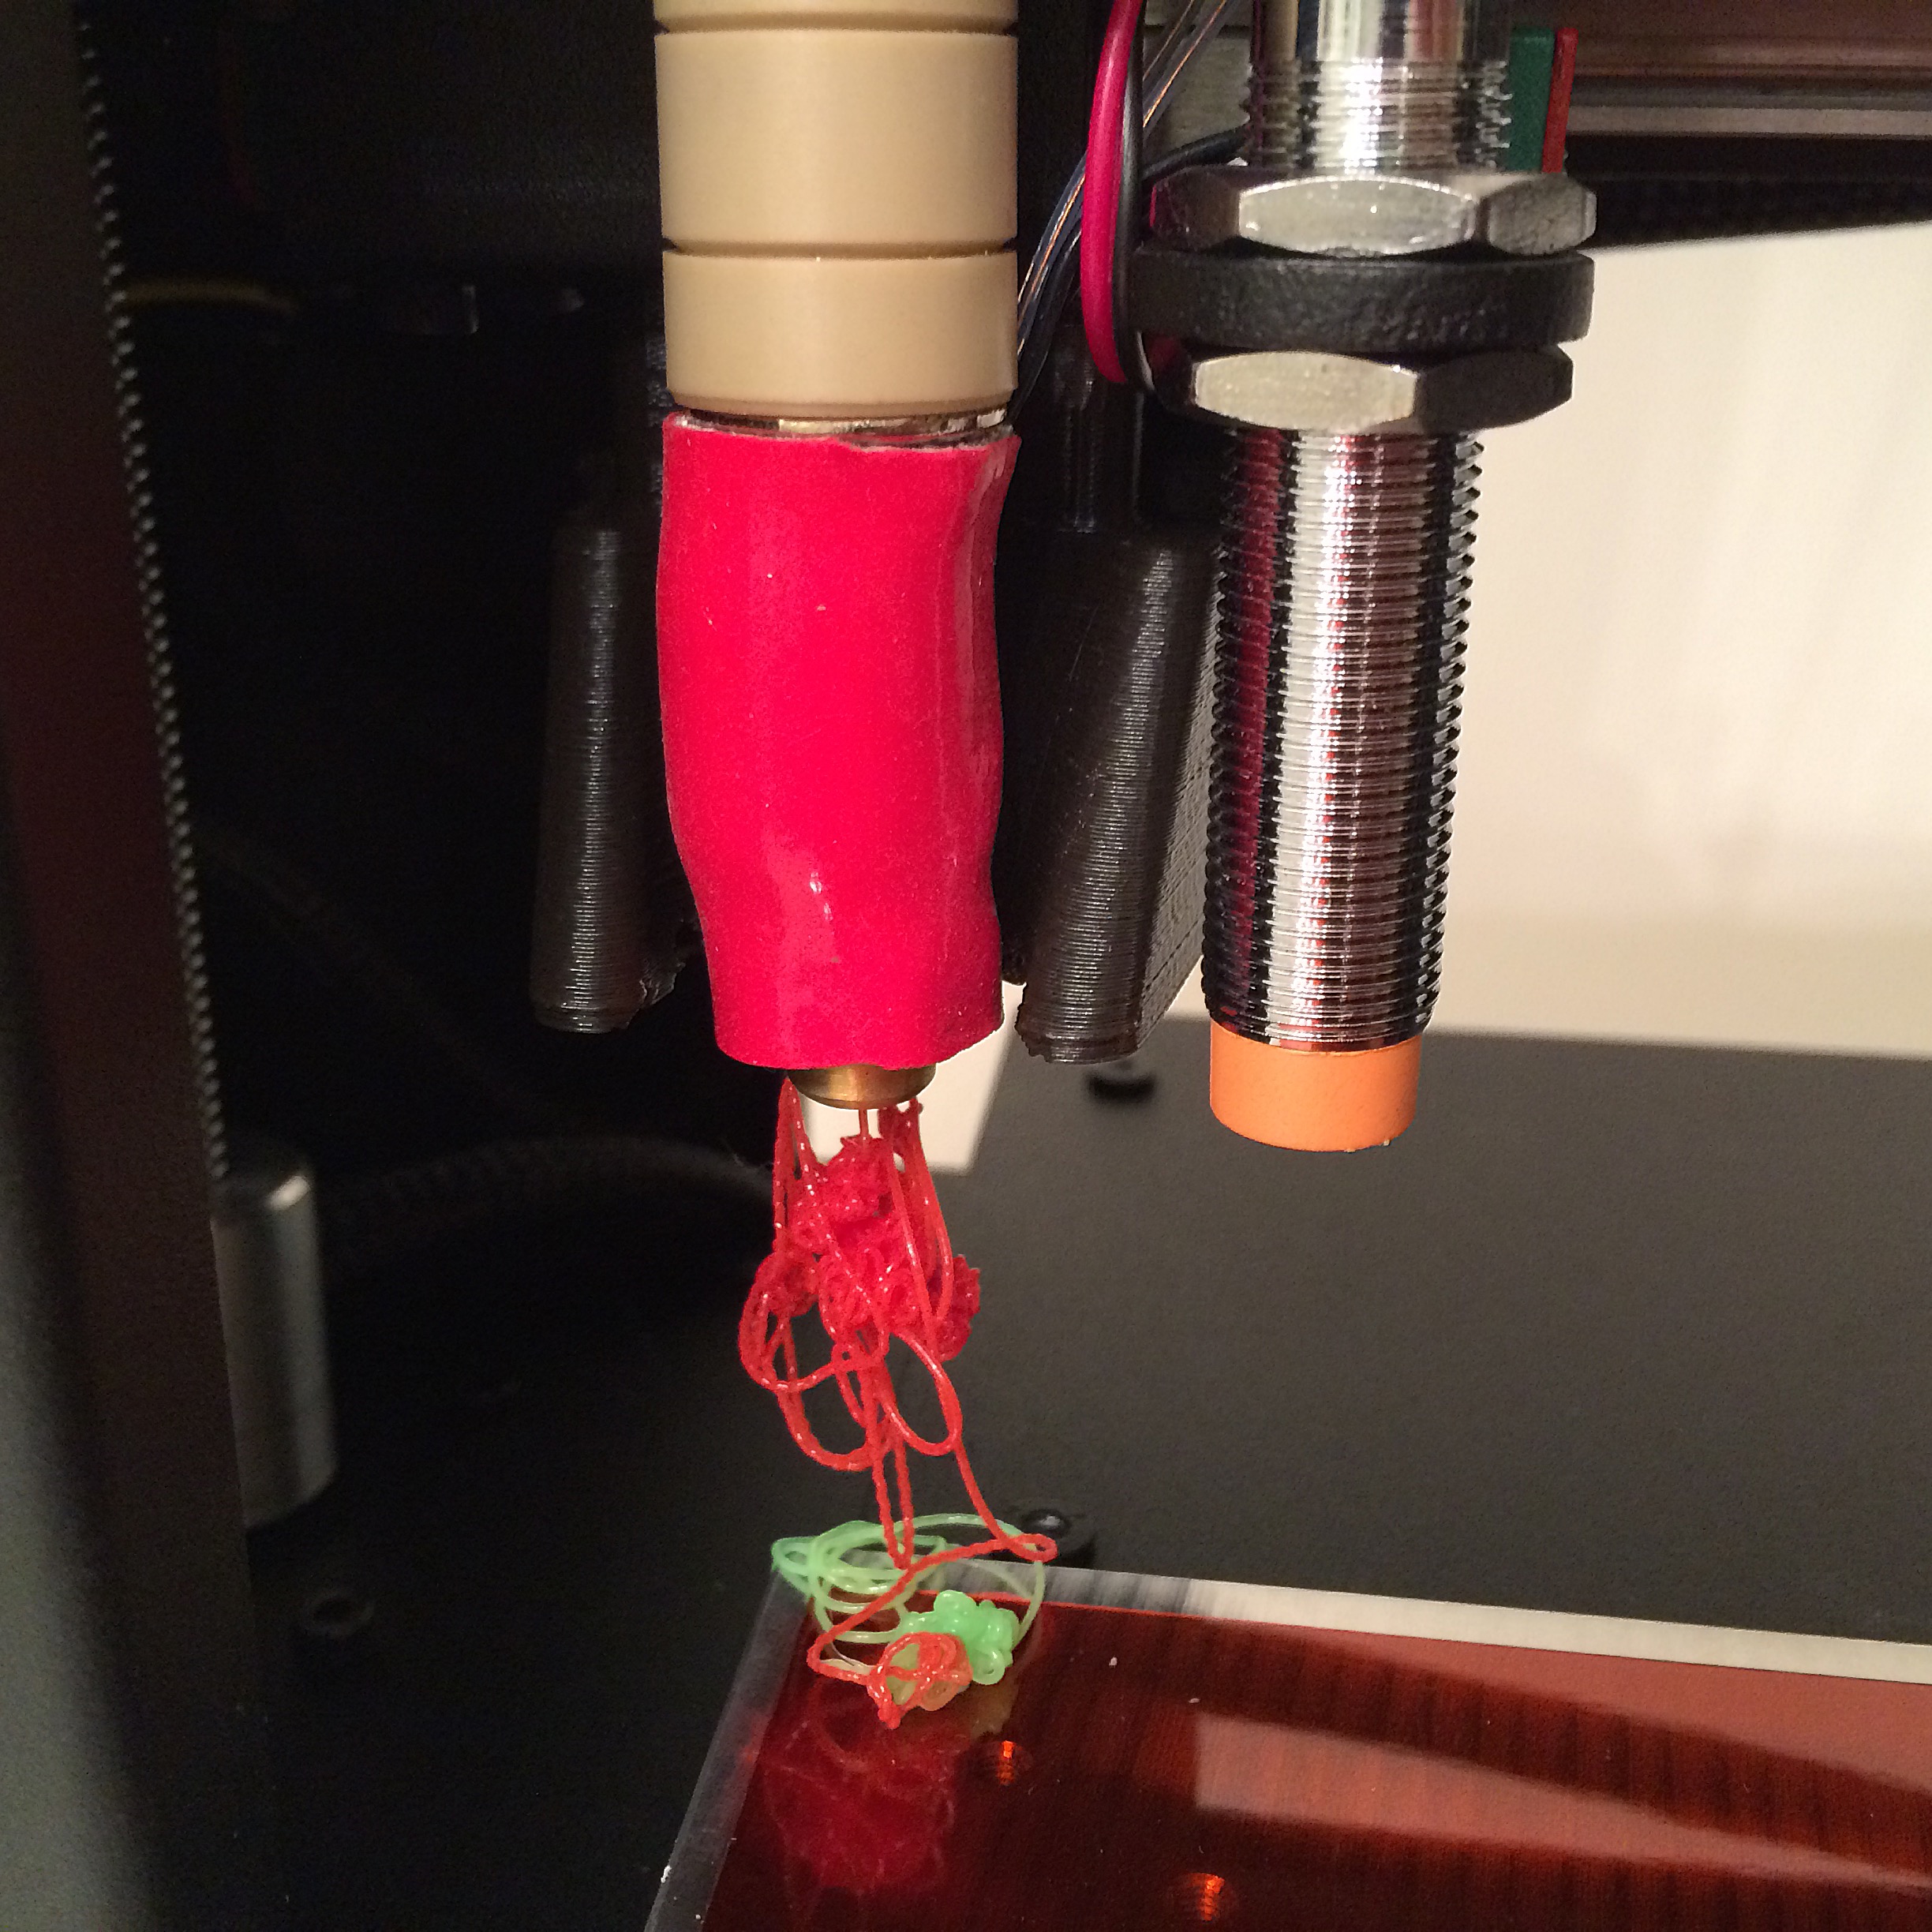
1st Print: Critical fail on 1st #Printrbot Metal Plus print. Filament sawed in half on metal frame when using holder on power supply. Seemed like too much friction when roll was on top of printer. The cut filament made a wedge that jammed inside extruder. Had to loosen filament tensioner, heat hot end, remove insulation sock, remove nozzle, jam brass rod up from underneath to push jam out. A quick fix for an experienced user but could be a crippling deal breaker for a newbie.
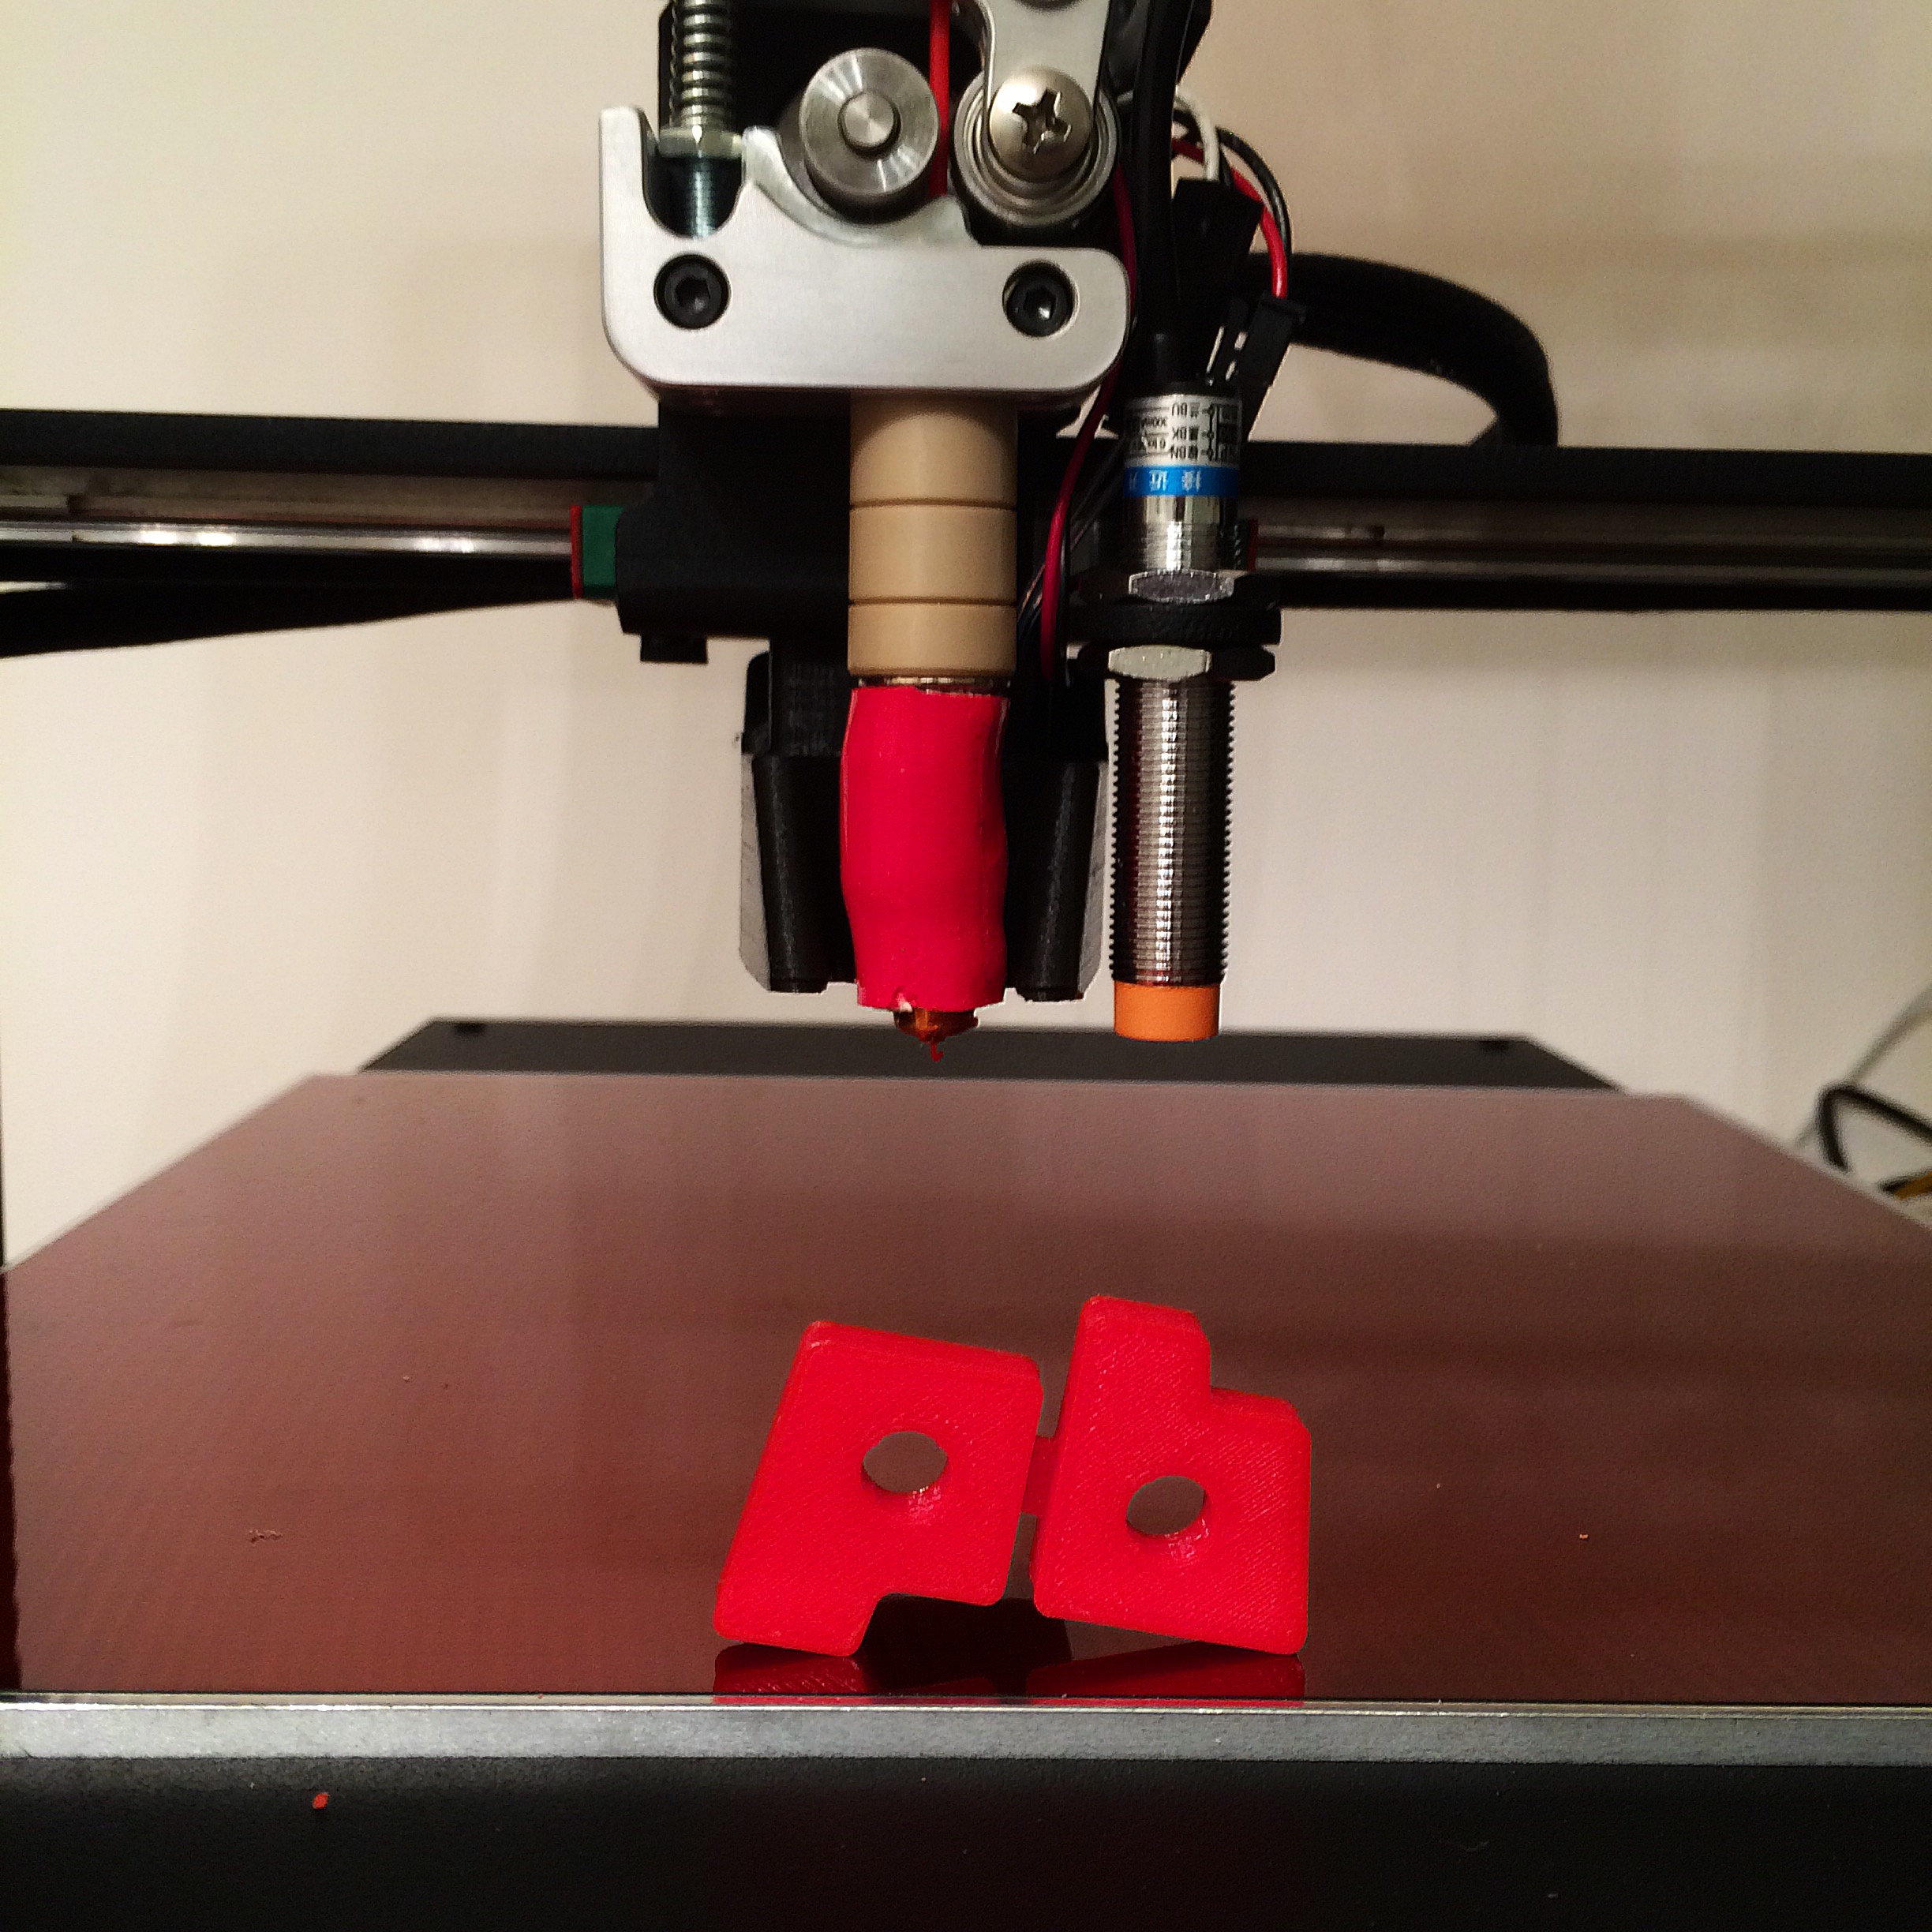
1st Successful Print: Printed flat and then flipped up for the photo. Used an existing Metal Simple gcode file.
Overnight Print: Was feeling optimistic and ran a very complicated protein model overnight. The model has printed successfully in the past on a Metal Simple. Appear the model popped off the kapton tape. Likely the print head dragged against one of the many column pieces and pulled it off.
Fix: Added some packing tape to top of printer where spool rests to reduce friction. Thanks to @ecken for the tip. Short term solution. Looks like Printbot has released a spool coaster for top of Metal Plus on Youmagine so likely others are experiencing issue. Also switching back to blue painter’s tape for regular PLA prints. Will likely try BuildTak or a sheet of PEI as long term bed surface solution.

More Prints: Eiffel tower by LeFabShop shows that slicer setting make a big difference, CURA had an air gap of 0.22 mm between raft and first layer of model. This resulted in legs breaking off. Changing to 0.11mm and printed fine. Snowman by Fred Bartels just because I had the file already sliced.


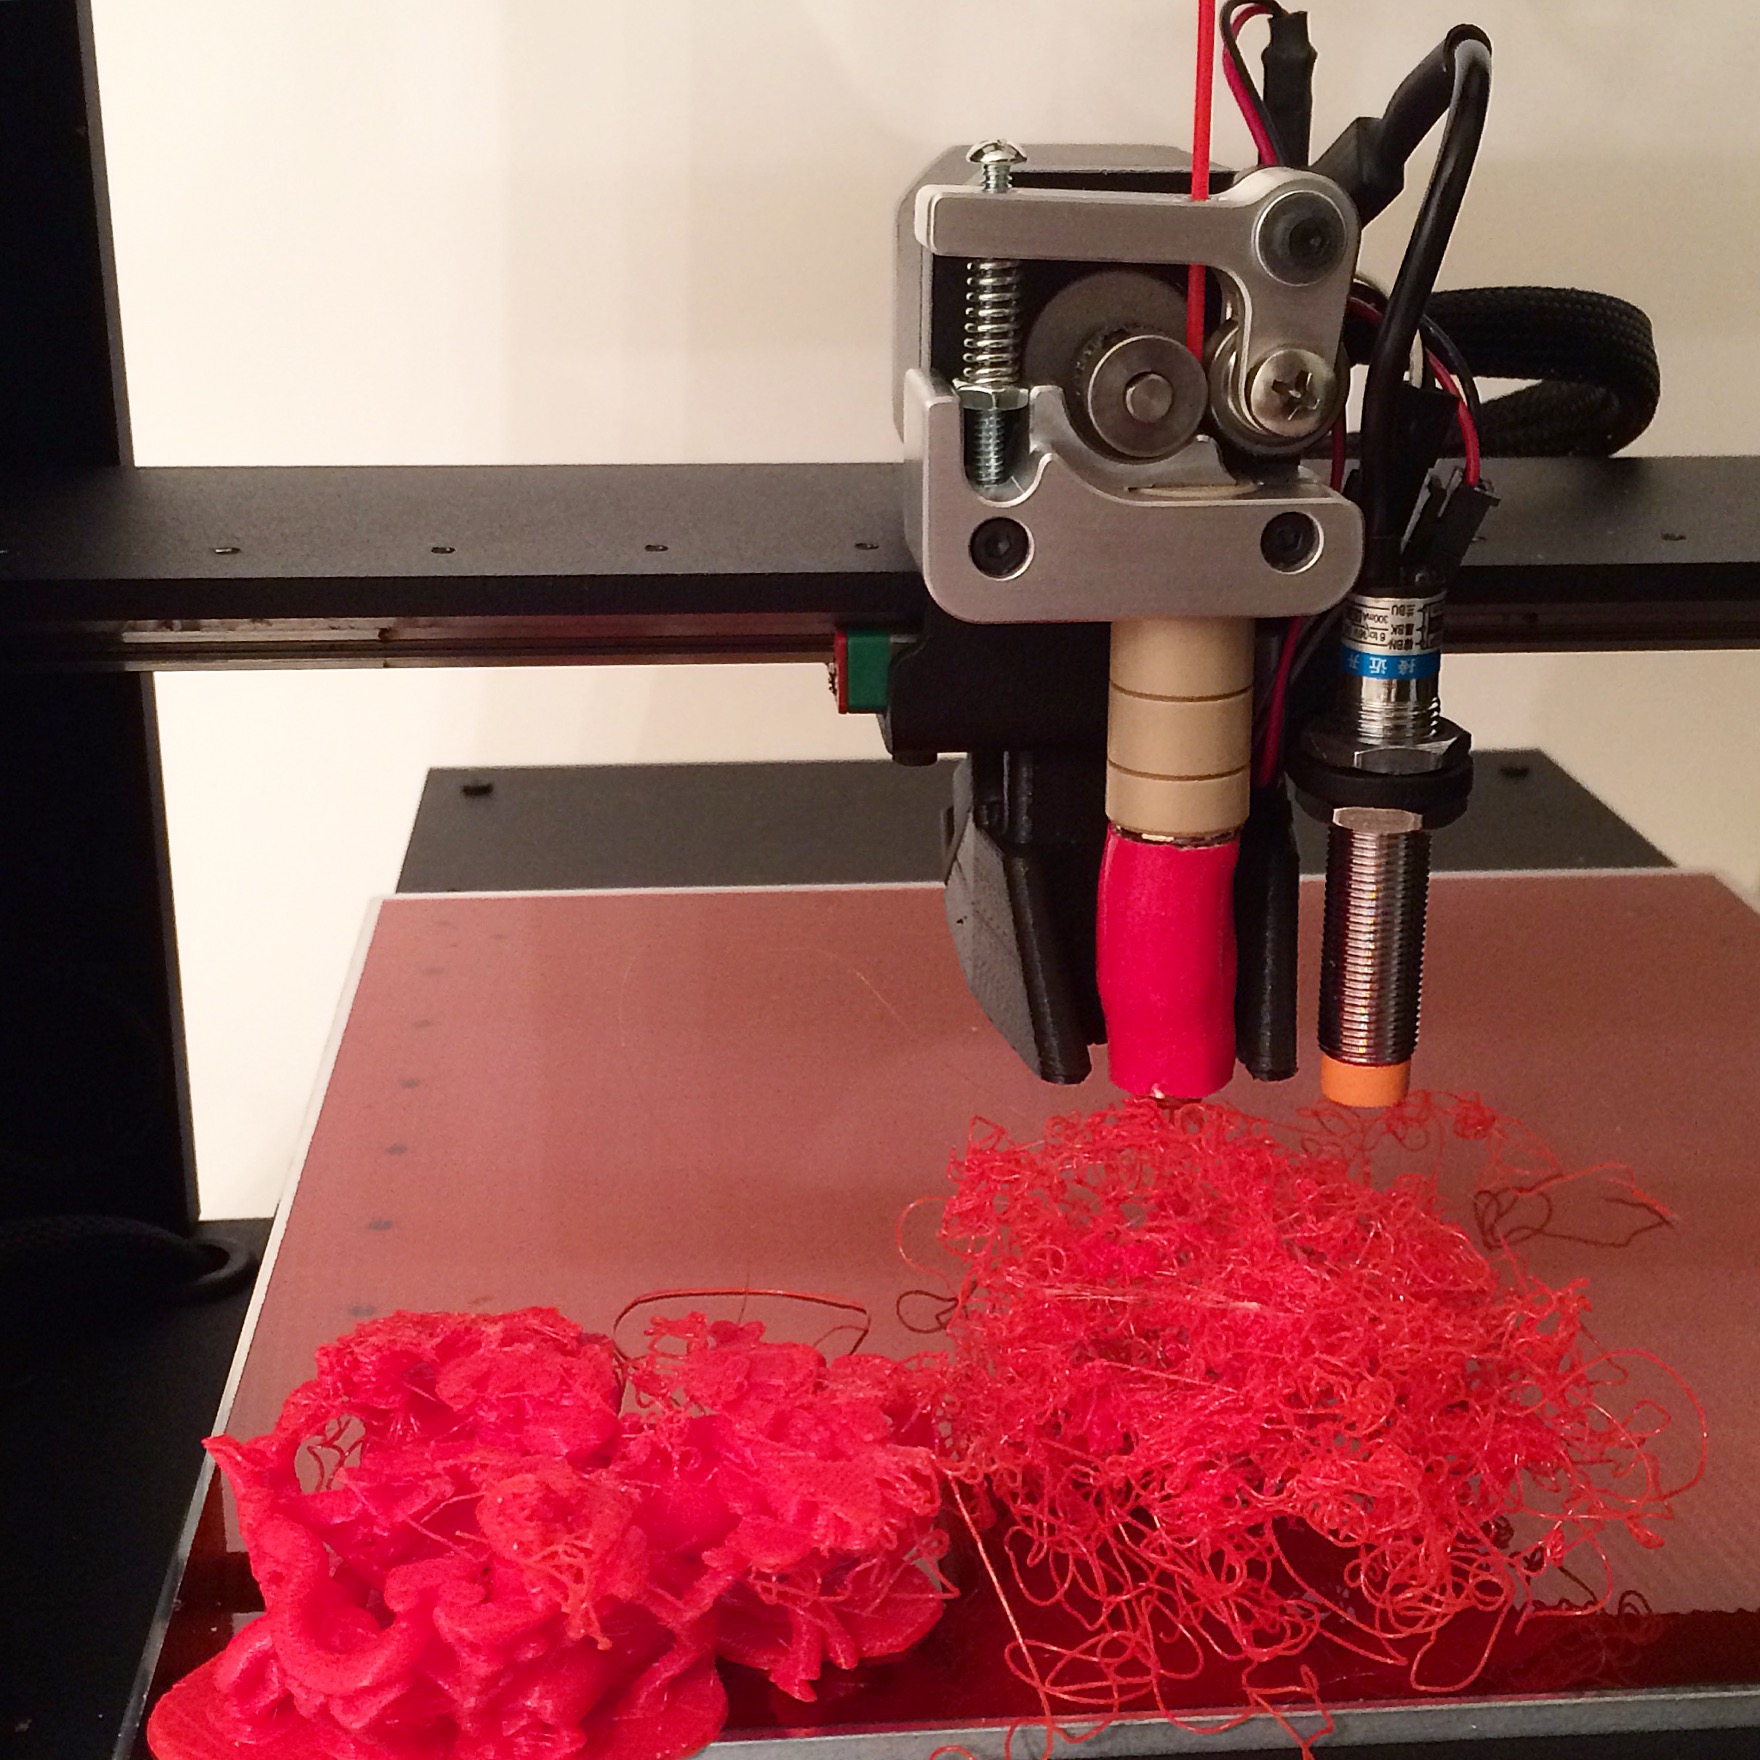
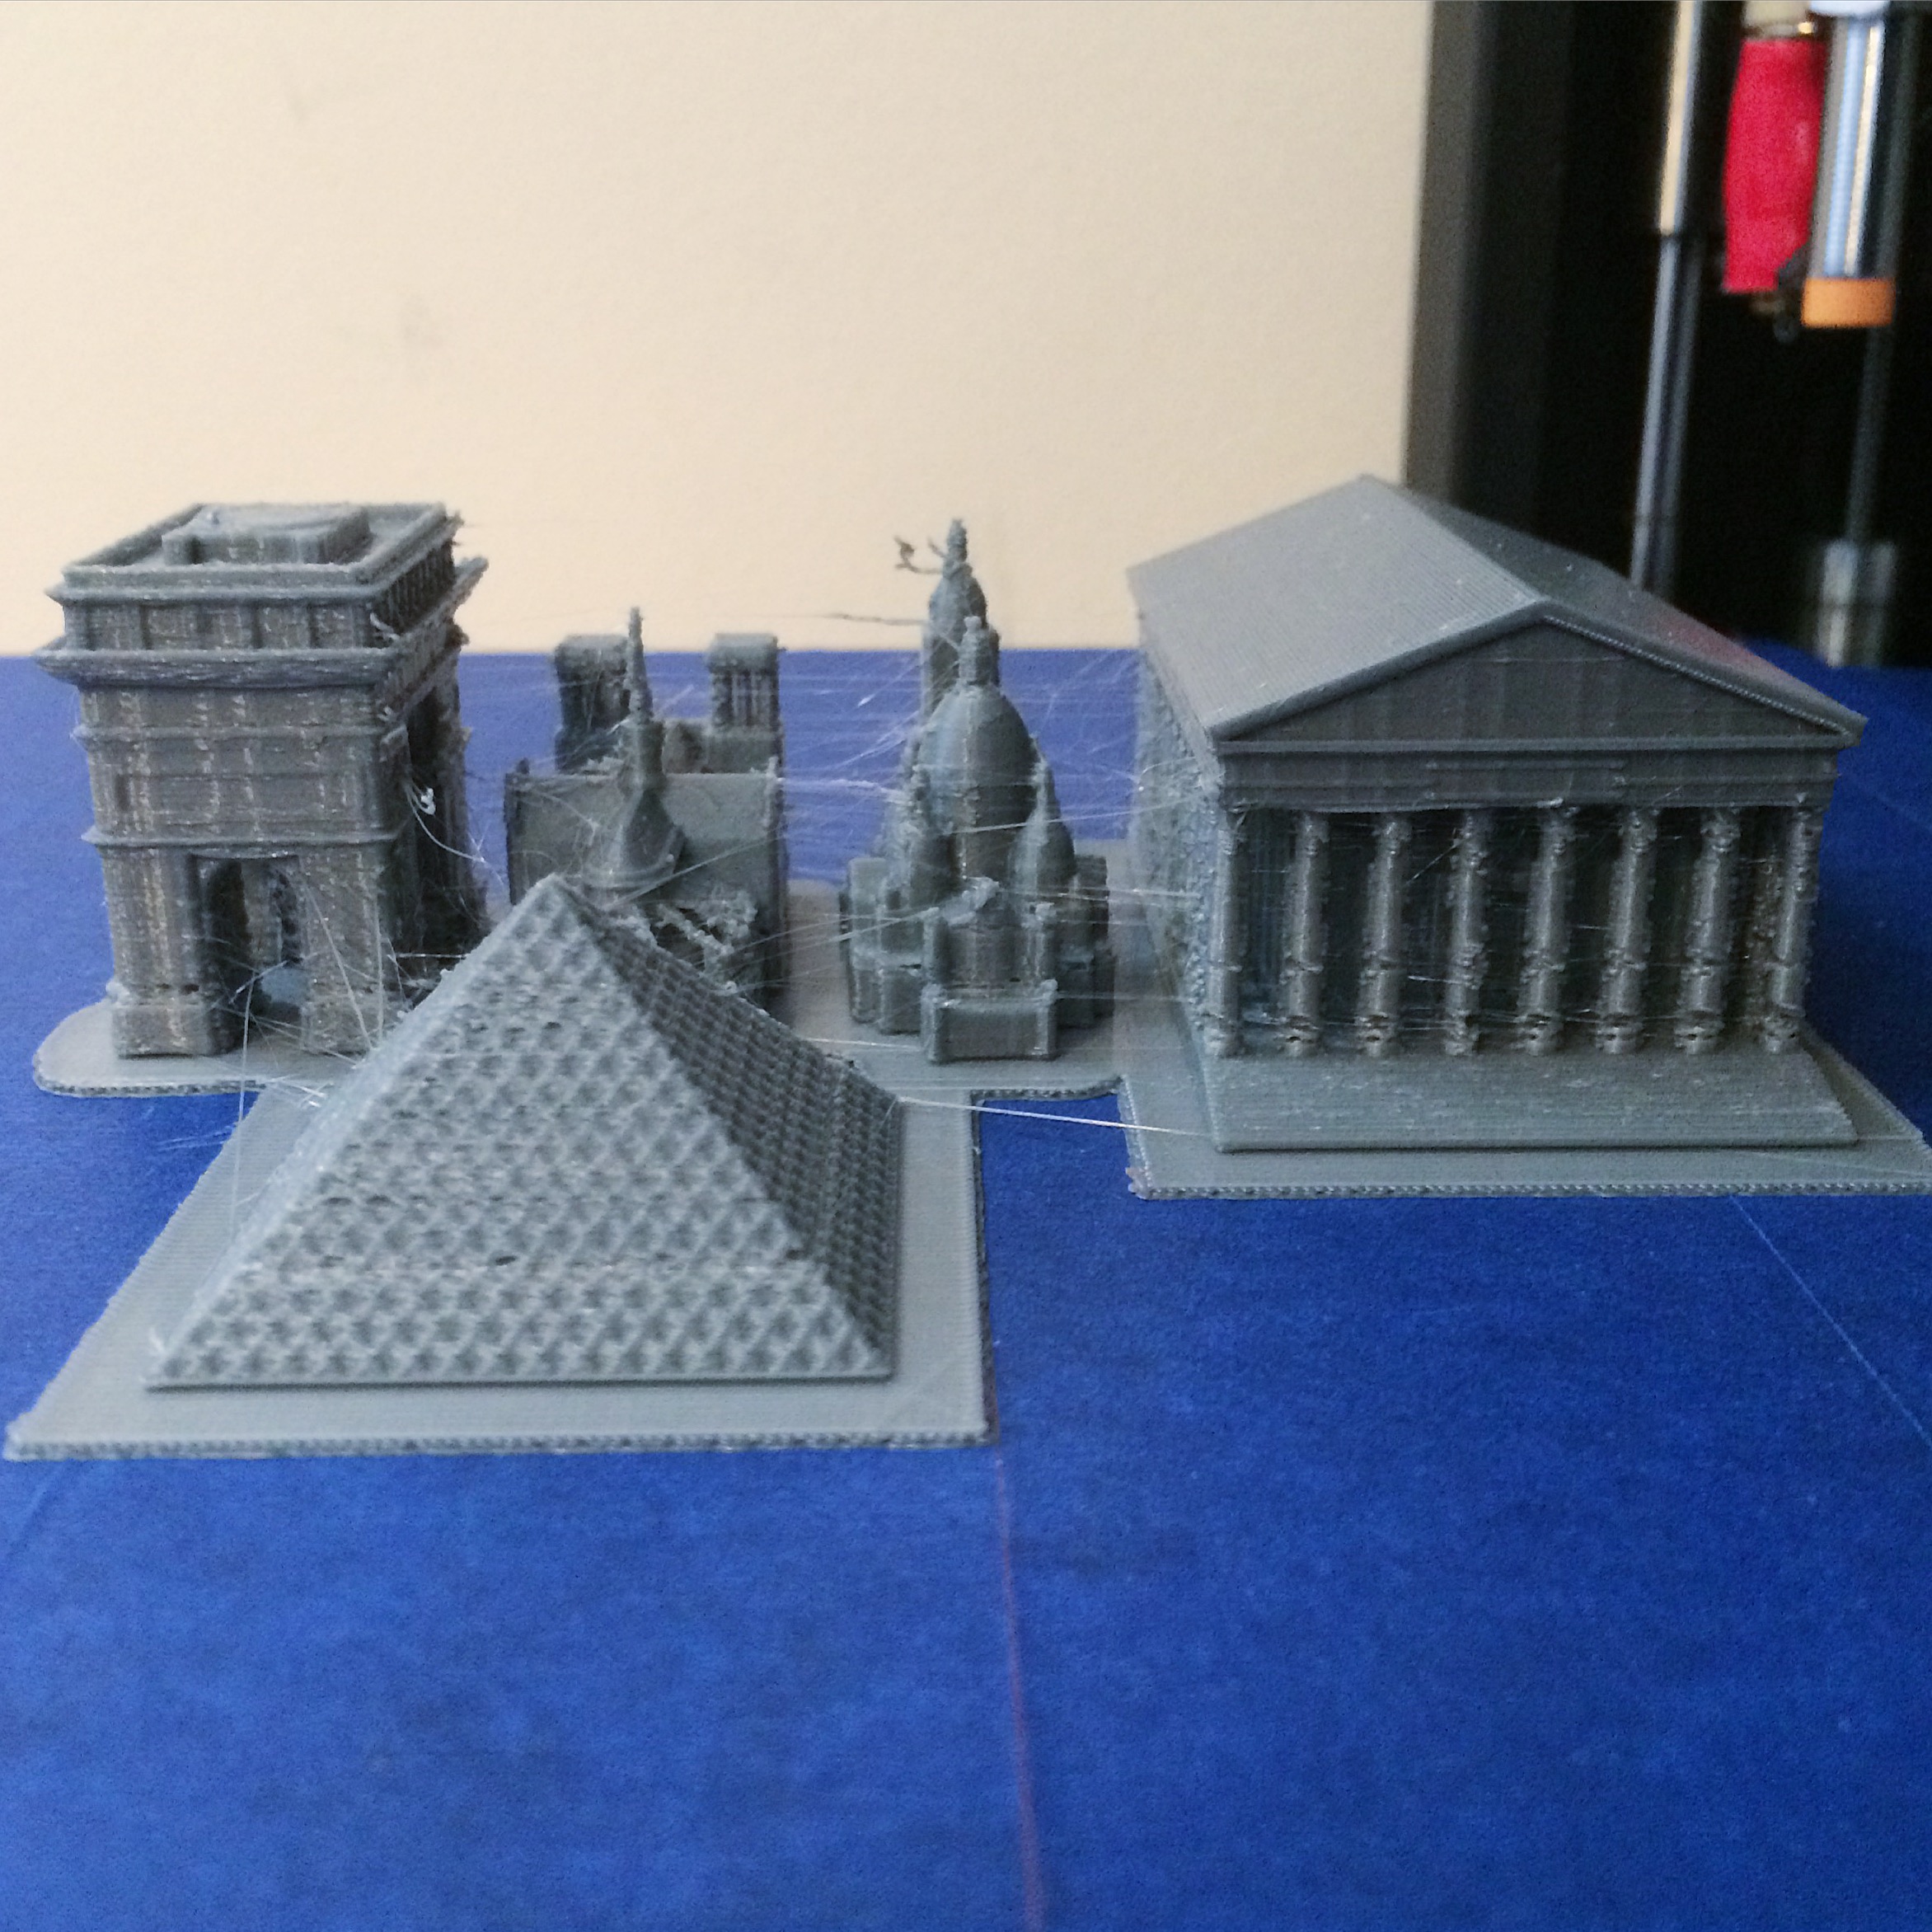
Torture Print: Running the printer for 11 hours using a set of Paris buildings from LeFabShop. French teacher asked for these models for use in class. Type of project where I would like to be able to run a bunch of small things overnight and have good quality. Print finished without jamming. Some underextrusion mid-print. Overall all models are level. Issues with spider webbing using cheap MicroCenter filament. Will have to adjust settings and try different filament.


Next Step: I would like to be able to print fast and with high quality across the entire print bed surface. Need to dial in the printer and figure out best settings for different type of prints. A feed system that allows for using loose filament or a cracked spool is on the list. I’m concerned about the wobble of the printer. Would really like to clamp the whole thing to the work surface like I do with the Metal Simple.
Currently running a torture test of 45 models taking 8″x5″ to test bed level. Would have covered the entire bed but it would take too long.

Thanks for following along. Please leave any tips or suggestions in the comments or contact me on Twitter @DesignMakeTeach.
Though spider webbing isn’t ideal, a heat gun can clear minor spider webs up very quickly.